The best conversion for a steep commute is not automatically the one with the biggest wattage figure. Route, traction, current delivery, bicycle fit, braking and public-road rules all have to work together.
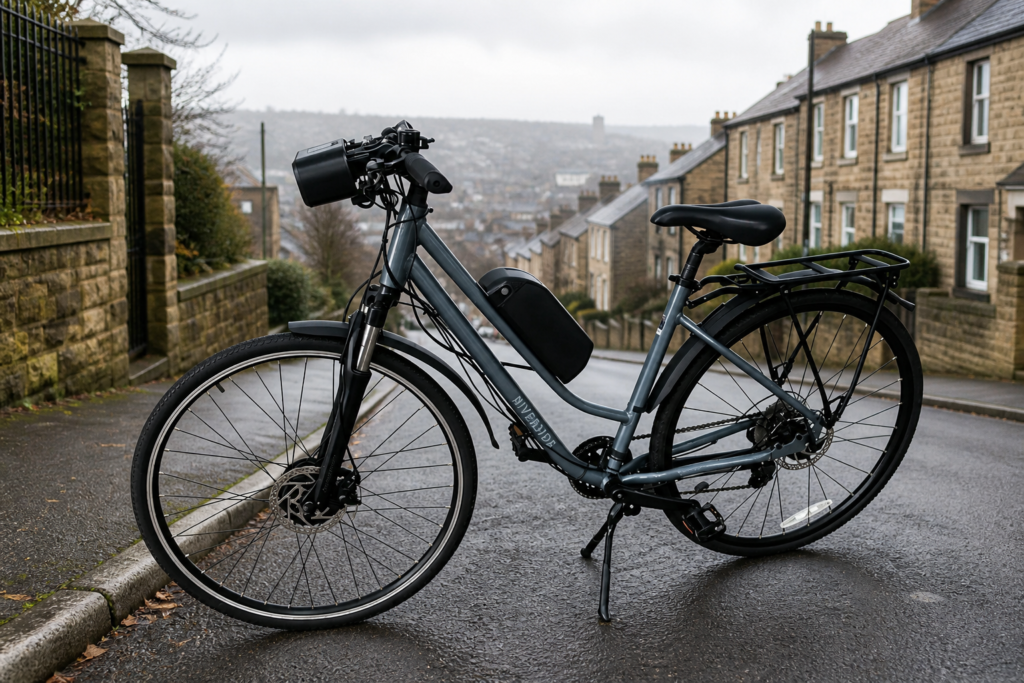
KirbEbike EZ Rider-equipped commuter bike on a steep UK street. Scene created from KirbEbike’s current installed-bike product photograph.
On a map, a five-mile commute looks short. In a hilly city, it can include a long climb, several low-speed starts at junctions and a wet descent on the way home. Add a laptop, locks, shopping or a child seat and the same bicycle faces a very different job from a weekend ride on level ground.
That is why choosing an ebike conversion kit for hills by advertised motor watts alone is a poor shortcut. A conversion can support steep commuting when the motor, controller, battery, wheel size, donor bicycle and brakes are matched to the real route. For public-road riding in Great Britain, that decision must also begin with the EAPC rules rather than an assumption that more power is always better.
Short answer: For a Great Britain public-road commute, start with a system that qualifies as an EAPC: usable pedals, a motor with a maximum continuous rated output no higher than 250W, and assistance that cuts off at 15.5mph. Hill suitability is then decided by gearing, rider input, traction, loaded weight, controller-to-battery matching, heat and braking, not by wattage alone.
Start with the route, not the motor
Before comparing kits, describe the commute as an engineering problem. Average distance and total elevation are useful, but they do not show how the load arrives. A steady climb allows a motor to settle into a repeatable operating condition. Repeated hill starts demand high torque at low wheel speed, when a hub motor may be less efficient and more likely to build heat.
Record these details before shopping:
- The steepest gradient and how long it continues, not only the average gradient.
- The number of starts on an incline at traffic lights, junctions and crossings.
- Rider, bicycle and luggage weight, including a trailer or child seat when relevant.
- Wet surfaces, broken tarmac and winter conditions that affect grip and stopping distance.
- Whether the converted bike will be used on Great Britain public roads, private land or both.
Two journeys with the same elevation gain can therefore require different systems. For urban hills, repeated low-speed starts and the heat they create can matter more than headline top speed.
What actually helps an electric conversion climb?
Climbing is the result of several parts working together. Motor torque matters, but so does the speed at which the motor is turning, how much current the controller requests and whether the battery can supply that current without excessive voltage drop or heat.
- Motor behaviour at climbing speed: a motor that feels lively on level ground can struggle if it spends a long time turning slowly under heavy load.
- Controller current: this determines how aggressively the system asks for electrical power. It must stay within the limits of the motor, wiring and battery.
- Battery discharge capability: nominal voltage is only part of the story. The cells and battery management system must support the controller’s continuous demand.
- Wheel diameter: a smaller driven wheel generally improves mechanical leverage, while a larger wheel changes motor speed and heat behaviour on the same climb.
- Gearing and rider input: on a road-compliant 250W system, using a sensible bicycle gear and contributing through the pedals can be decisive.
- Total load and conditions: wind, tyre pressure, cold weather, gradient length and stop-start traffic all influence performance and range.
Voltage does not equal climbing ability, amp-hours do not equal power, and a nominal motor rating does not describe the complete system. The useful question is whether the whole system can deliver the required assistance repeatedly without compromising fit, safety or legality.
Front hub, rear hub or mid-drive?
Motor position changes traction, installation and maintenance. None is automatically best for every hill. The donor bike and the way it will be ridden decide the trade-off.
| Drive position | Where it can work well | Main hill-related limitation | Critical fit and maintenance check |
|---|---|---|---|
| Front hub | Compatible commuter bikes where simple drivetrain interaction and straightforward servicing matter. | Front-wheel grip can reduce on steep, wet or loose surfaces, especially when weight shifts rearward. | Fork material, open-dropout width, axle retention, brake clearance and torque-control requirements. |
| Rear hub | Riders who want driven-wheel traction and a conventional push from the rear. | The rear installation has more drivetrain and brake interfaces to match. | Dropout width, cassette or freewheel format, speed count, rotor position, cable routing and wheel removal. |
| Mid-drive | Sustained climbing where using the bicycle’s gears is valuable. | Higher chain and cassette loads, plus more demanding shifting and installation. | Bottom-bracket standard, frame clearance, chain line and the condition of the drivetrain. |
A front hub can be a tidy commuter solution on the right fork, but it should not be sold as a universal answer for wet, severe gradients. A rear hub often offers better traction, yet asks more questions about the rear dropout, gears and brake alignment. A mid-drive uses the bicycle’s gears efficiently, but its wear and installation costs are different. Choose by the complete set of compromises, not a single online ranking.
Battery capacity and current are different decisions
Battery capacity is best compared in watt-hours: nominal voltage multiplied by amp-hours. Watt-hours describe stored energy and help estimate how long a system can run. They do not show whether the battery can safely deliver the current demanded by a controller during a long climb.
Think of capacity as the size of the fuel tank and current capability as the rate at which the tank can feed the system. Two batteries with similar watt-hours can behave differently under load if their cells or BMS have different continuous-discharge limits. The battery’s nominal voltage must also match the controller and motor system.
Hills, cold weather, heavy loads, soft tyres and high assistance normally reduce real-world range. A credible estimate therefore states its assumptions instead of promising a fixed number of miles. The charger also belongs to the matched system: use the supplied or manufacturer-authorised charger rather than treating plugs and voltage labels as proof of compatibility.
Run an axle-first and battery-space fit check
The expensive mistake is choosing a motor first and measuring the bicycle afterwards. When comparing electric bike conversion kits, begin with the axle, dropout and battery envelope, then narrow the power and battery options.
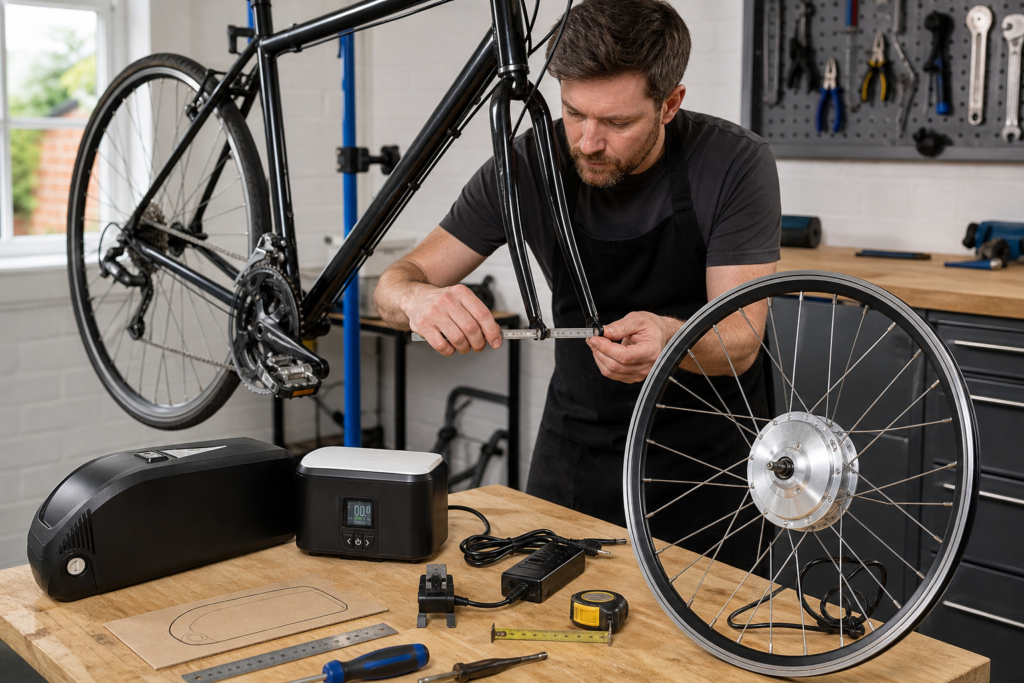
Measure axle type, dropout spacing and battery removal clearance before ordering. AI-generated scene created from KirbEbike product references.
- Identify an open dropout or thru-axle before selecting a hub-motor wheel. A standard hub wheel should not be forced into an incompatible axle system.
- Measure front or rear dropout spacing and verify axle shape and retention.
- Check frame and fork material. A carbon fork is not a routine DIY candidate for a front hub motor.
- Read the tyre sidewall or ETRTO marking to match the actual rim and tyre size rather than relying only on labels such as 29-inch or 700C.
- Confirm disc or rim brake compatibility, rotor position, calliper clearance and mudguard clearance.
- For a rear hub, identify cassette versus freewheel and count the current sprockets.
- Obtain the battery case drawing and make a cardboard template before ordering.
- Test the battery footprint, cable exit and the direction required to slide the removable pack off its mounting rail.
A battery can fit inside the frame triangle yet still be impossible to remove because there is no clearance to slide it along the rail. That is a removal-direction problem, not evidence that the battery itself is fixed. The bracket must also be supported securely; bottle-cage mounts are useful, but they are not automatically suitable for every battery, frame and riding load.
The descent may be the harder safety test
A motor helps on the way up; the brakes, tyres and frame carry the responsibility on the way down. Conversion parts add mass, and a hilly commute can demand repeated braking in rain. Inspect pads, cables or hoses, rotors, rims, tyres, spokes and bearings before adding electrical assistance.
A brake cut-off sensor can stop motor assistance when the lever is used, but it does not improve mechanical stopping power. If the donor bicycle already needs wheel, brake or frame repairs, compare the cost of that work with starting from a healthier bike. A competent cycle mechanic should assess anything uncertain, particularly fork condition, axle retention and braking for a loaded commuter.
Great Britain public-road rules change the answer
For a converted bicycle to be treated as an electrically assisted pedal cycle on public roads in Great Britain, it must have pedals capable of propelling it, the motor’s maximum continuous rated output must not exceed 250W, and electrical assistance must cut off at 15.5mph. The rider must be at least 14. A compliant EAPC does not need registration, vehicle tax, insurance or a driving licence.
A system outside those conditions can be treated as a motorcycle or moped, bringing approval, registration, tax, insurance, licensing and helmet requirements. Northern Ireland should be checked separately rather than being assumed to follow every Great Britain detail.
A 500W, 750W, 1000W or higher continuously rated motor does not become an EAPC merely because a display or app limits the indicated power or speed. A temporary road mode cannot change the motor’s continuous rating. Higher-power systems should not be promoted for ordinary public-road commuting on that basis. Private-land use still requires the landowner’s permission and compliance with the site’s access rules.
For riders starting with a road-focused configuration, the KirbEbike EZ Rider 250W kit is the relevant product type to examine, but buyers must still verify the selected variant, pedal-assist behaviour, labelling, throttle configuration, fork fit and current documentation before use.
Build a route-based shortlist
The table below turns intended use into a shortlist without pretending that one system covers every route or legal context.
| Route or use | Legal starting point | System priority | Mechanical checks |
|---|---|---|---|
| Flat or rolling Great Britain commute | EAPC-compliant public-road configuration. | Low weight, removable battery, serviceability and simple fit. | Donor-bike condition, wheel size, axle, brakes and secure battery mount. |
| Steep Great Britain commute | The same EAPC requirements still apply. | Low gearing, rider input, traction and enough usable battery energy for repeated climbs. | Brake condition, tyres, loaded weight, fork/frame suitability and heat-aware riding. |
| Mixed road and private-property use | Treat road legality and private-land performance as separate questions. | Confirm whether the hardware itself qualifies as an EAPC before any public-road use. | Controller settings do not replace hardware, labelling and approval checks. |
| Private-land performance build | Not an ordinary EAPC commuter configuration. | Frame suitability, torque control, battery current, controller cooling and serviceability. | Professional inspection, strong brakes, suitable tyres and explicit landowner permission. |
Install and test in stages
Installation time depends on the axle, brakes, drivetrain, battery mount, wiring and the condition of the donor bike. Treat a universal 20-minute claim as a best-case demonstration, not a planning guarantee. A careful sequence is more useful than a stopwatch:
- Photograph the donor bicycle and inspect the fork, frame, wheels and brakes before disassembly.
- Install the motor wheel without forcing or spreading incompatible dropouts.
- Secure the battery bracket and prove that the pack can be removed before final cable routing.
- Route connectors away from sharp bends, pinch points, tyres, chainrings and steering movement.
- Check wheel seating, axle retention, torque-control hardware and brake operation before applying power.
- Begin with low assistance in a flat, traffic-free area and listen for rubbing, movement or unusual noise.
- Recheck axle nuts, torque arm, spokes, brake alignment and battery mount after the first short rides.
Stop if a connector, battery, controller or motor becomes abnormally hot, damaged or loose. Electrical performance is never a reason to continue riding a mechanically uncertain bicycle.
The final go or no-go checklist
- Where will the converted bicycle legally be used?
- What are the steepest gradient, climb duration and total loaded weight?
- Are the frame, fork, wheels and brakes in sound condition?
- Do axle type, dropout width, wheel size, brake system and drivetrain match the kit?
- Does the battery fit securely and slide off its mounting rail?
- Do motor voltage, controller current and battery BMS capability match?
- Are the battery and charger an authorised compatible pair?
- Would professional installation or inspection reduce a material risk?
If any answer is unknown, pause the order and measure or ask for technical confirmation. The best hill conversion is the lowest-risk complete system that fits the bicycle, supports the real route and complies with the rules for where it will be ridden.
Frequently asked questions
Is a 250W ebike conversion kit enough for UK hills?
It can be enough for many Great Britain commutes, but there is no universal gradient guarantee. A 250W system is most likely to remain practical when:
- The rider pedals and shifts into an appropriate bicycle gear before the climb.
- The route does not combine a very long gradient with repeated loaded hill starts.
- Tyres, brakes, battery charge and total carried weight are managed sensibly.
Which motor position suits a steep commute?
There is no automatic winner. Start with the position that the donor bicycle can safely accept, then compare the route trade-offs:
- Front hub: simpler drivetrain integration, but front-wheel grip needs care on steep, wet or loose surfaces.
- Rear hub: usually better driven-wheel traction, with more gear, brake and dropout interfaces to match.
- Mid-drive: uses the bicycle’s gears effectively on sustained climbs, while increasing drivetrain wear and installation demands.
How should I size a battery for a hilly commute?
Use a route budget rather than a maximum-range claim:
- Calculate nominal watt-hours by multiplying battery voltage by amp-hours.
- Estimate consumption for the loaded return route, including climbing, wind and cold.
- Add a practical reserve, then verify controller voltage, BMS current, case dimensions and charger compatibility.
Does a 250W limit mode make a high-power kit road legal?
No, not automatically. Great Britain EAPC classification concerns the motor’s maximum continuous rated output and assistance cut-off, among other conditions. A higher-rated motor does not become a 250W motor simply because software temporarily limits a displayed value.
What should be inspected before converting a bike for hills?
Inspect the complete donor bicycle, not only the place where the motor fits. The publication-ready minimum is:
- Fork or frame dropouts, axle interface and required torque-control hardware.
- Brake pads, rotors or rims, cables or hoses, tyres, spokes and bearings.
- Battery mounting strength, cable routing and removal clearance.
- A professional assessment where carbon parts, damage or fit uncertainty are involved.
Choose the complete system, not the biggest number
A useful conversion should make a familiar bicycle better suited to its real journey. It should not turn a marginal frame, weak brake system or mismatched battery into a faster problem. Measure the route, inspect the donor bike and decide the legal use first. Then compare motor position, battery energy, current capability and serviceability as one system.
That approach is less dramatic than shopping by watts, but it is much more likely to produce a conversion that climbs consistently, stops confidently and remains practical after the novelty of the first ride has worn off.